
In this article:
What are contact stages?
A contact stage shows where a contact currently stands in your outreach or sales process, so your team can track progress and prioritize next steps. Contact stages were previously called lead stages in Fello.
Every account includes four system stages, and you can create custom stages to match how your team works:
- New: Set automatically when a contact submits a form for the first time. Use it to spot fresh leads in your database.
- Follow-up: For contacts who need a follow-up task, such as a call, or are currently being followed up.
- Qualified: For contacts who have agreed to move forward, so your users can approach them to close deals.
- Disqualified: For contacts who have confirmed they aren't interested in moving forward right now.
Apart from New, stages are set manually or through workflows. Once a contact has a stage, you can change it but not remove it.
Change a contact's stage
From a contact record
- Go to the Contacts module from the left sidebar and select a contact.
- In the Details section, click the Edit (pencil) icon next to Contact Stage.
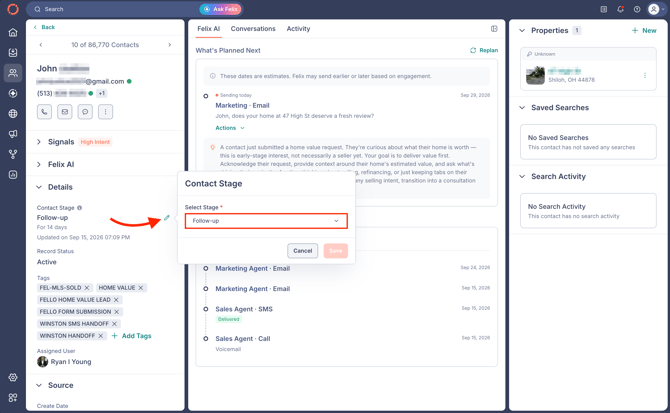
- Select a stage from the Select Stage dropdown.
- Click Save.
The Details section also shows how long the contact has been in their current stage and when it was last updated.
From the Contacts module
- Go to the Contacts module from the left sidebar.
- Select a stage from the Contact Stage column next to any contact.
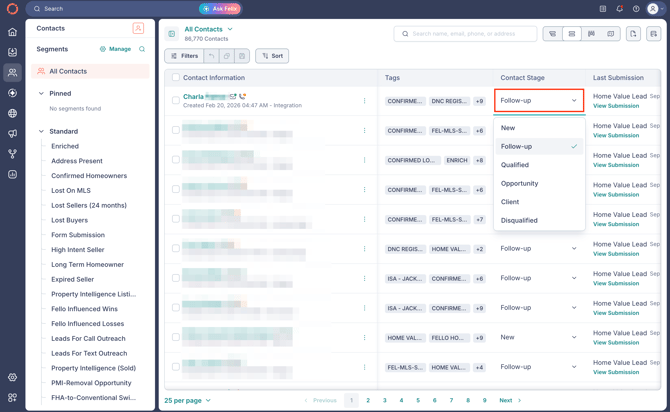
🗒️ Note: If you don't see the Contact Stage column, you can add it. Learn how to customize columns in the Contacts module.
💡 Tip: To see all of your contacts organized by stage, similar to a Kanban board, click the Column View icon in the top-right corner of the Contacts module. Then click Group By, select Contact Stage as the Attribute, and click Save. Each stage becomes a column showing how many contacts it holds, and you can drag contacts between columns to change their stage.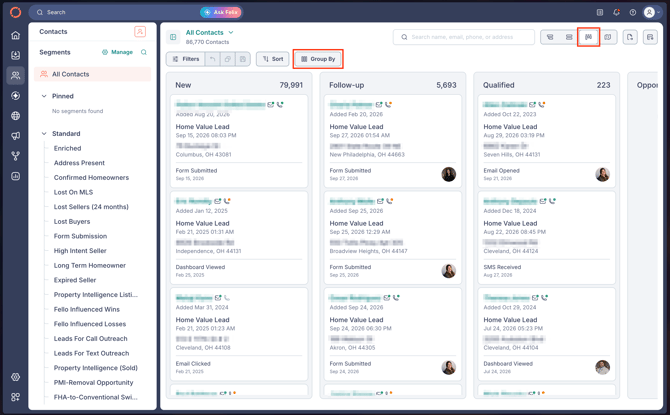
With workflows
Use the Update Contact Stage action to change a contact's stage automatically.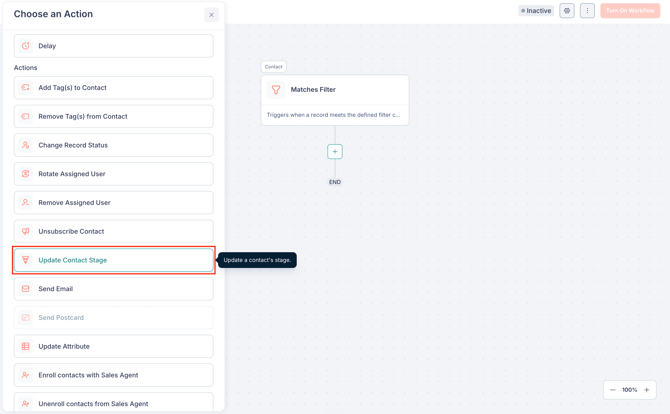
If you've integrated with a CRM like BoldTrail, Follow Up Boss, or Sierra, pair it with the CRM Stage Updated event to keep stages in sync with your CRM. Learn more about workflows.
Find contacts by stage
- Go to the Contacts module from the left sidebar.
- Click Filters and select Contact Stage.
- Choose an operator, such as is any of, and select one or more stages.
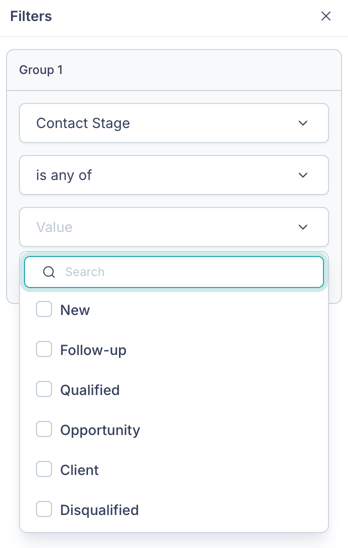
To keep this list handy, save it as a segment. Learn more about segments.
Manage contact stages
To view all of your contact stages:
- Click Settings from the bottom-left corner.
- Go to Objects under Data.
- With Contacts selected, open the Stages tab.
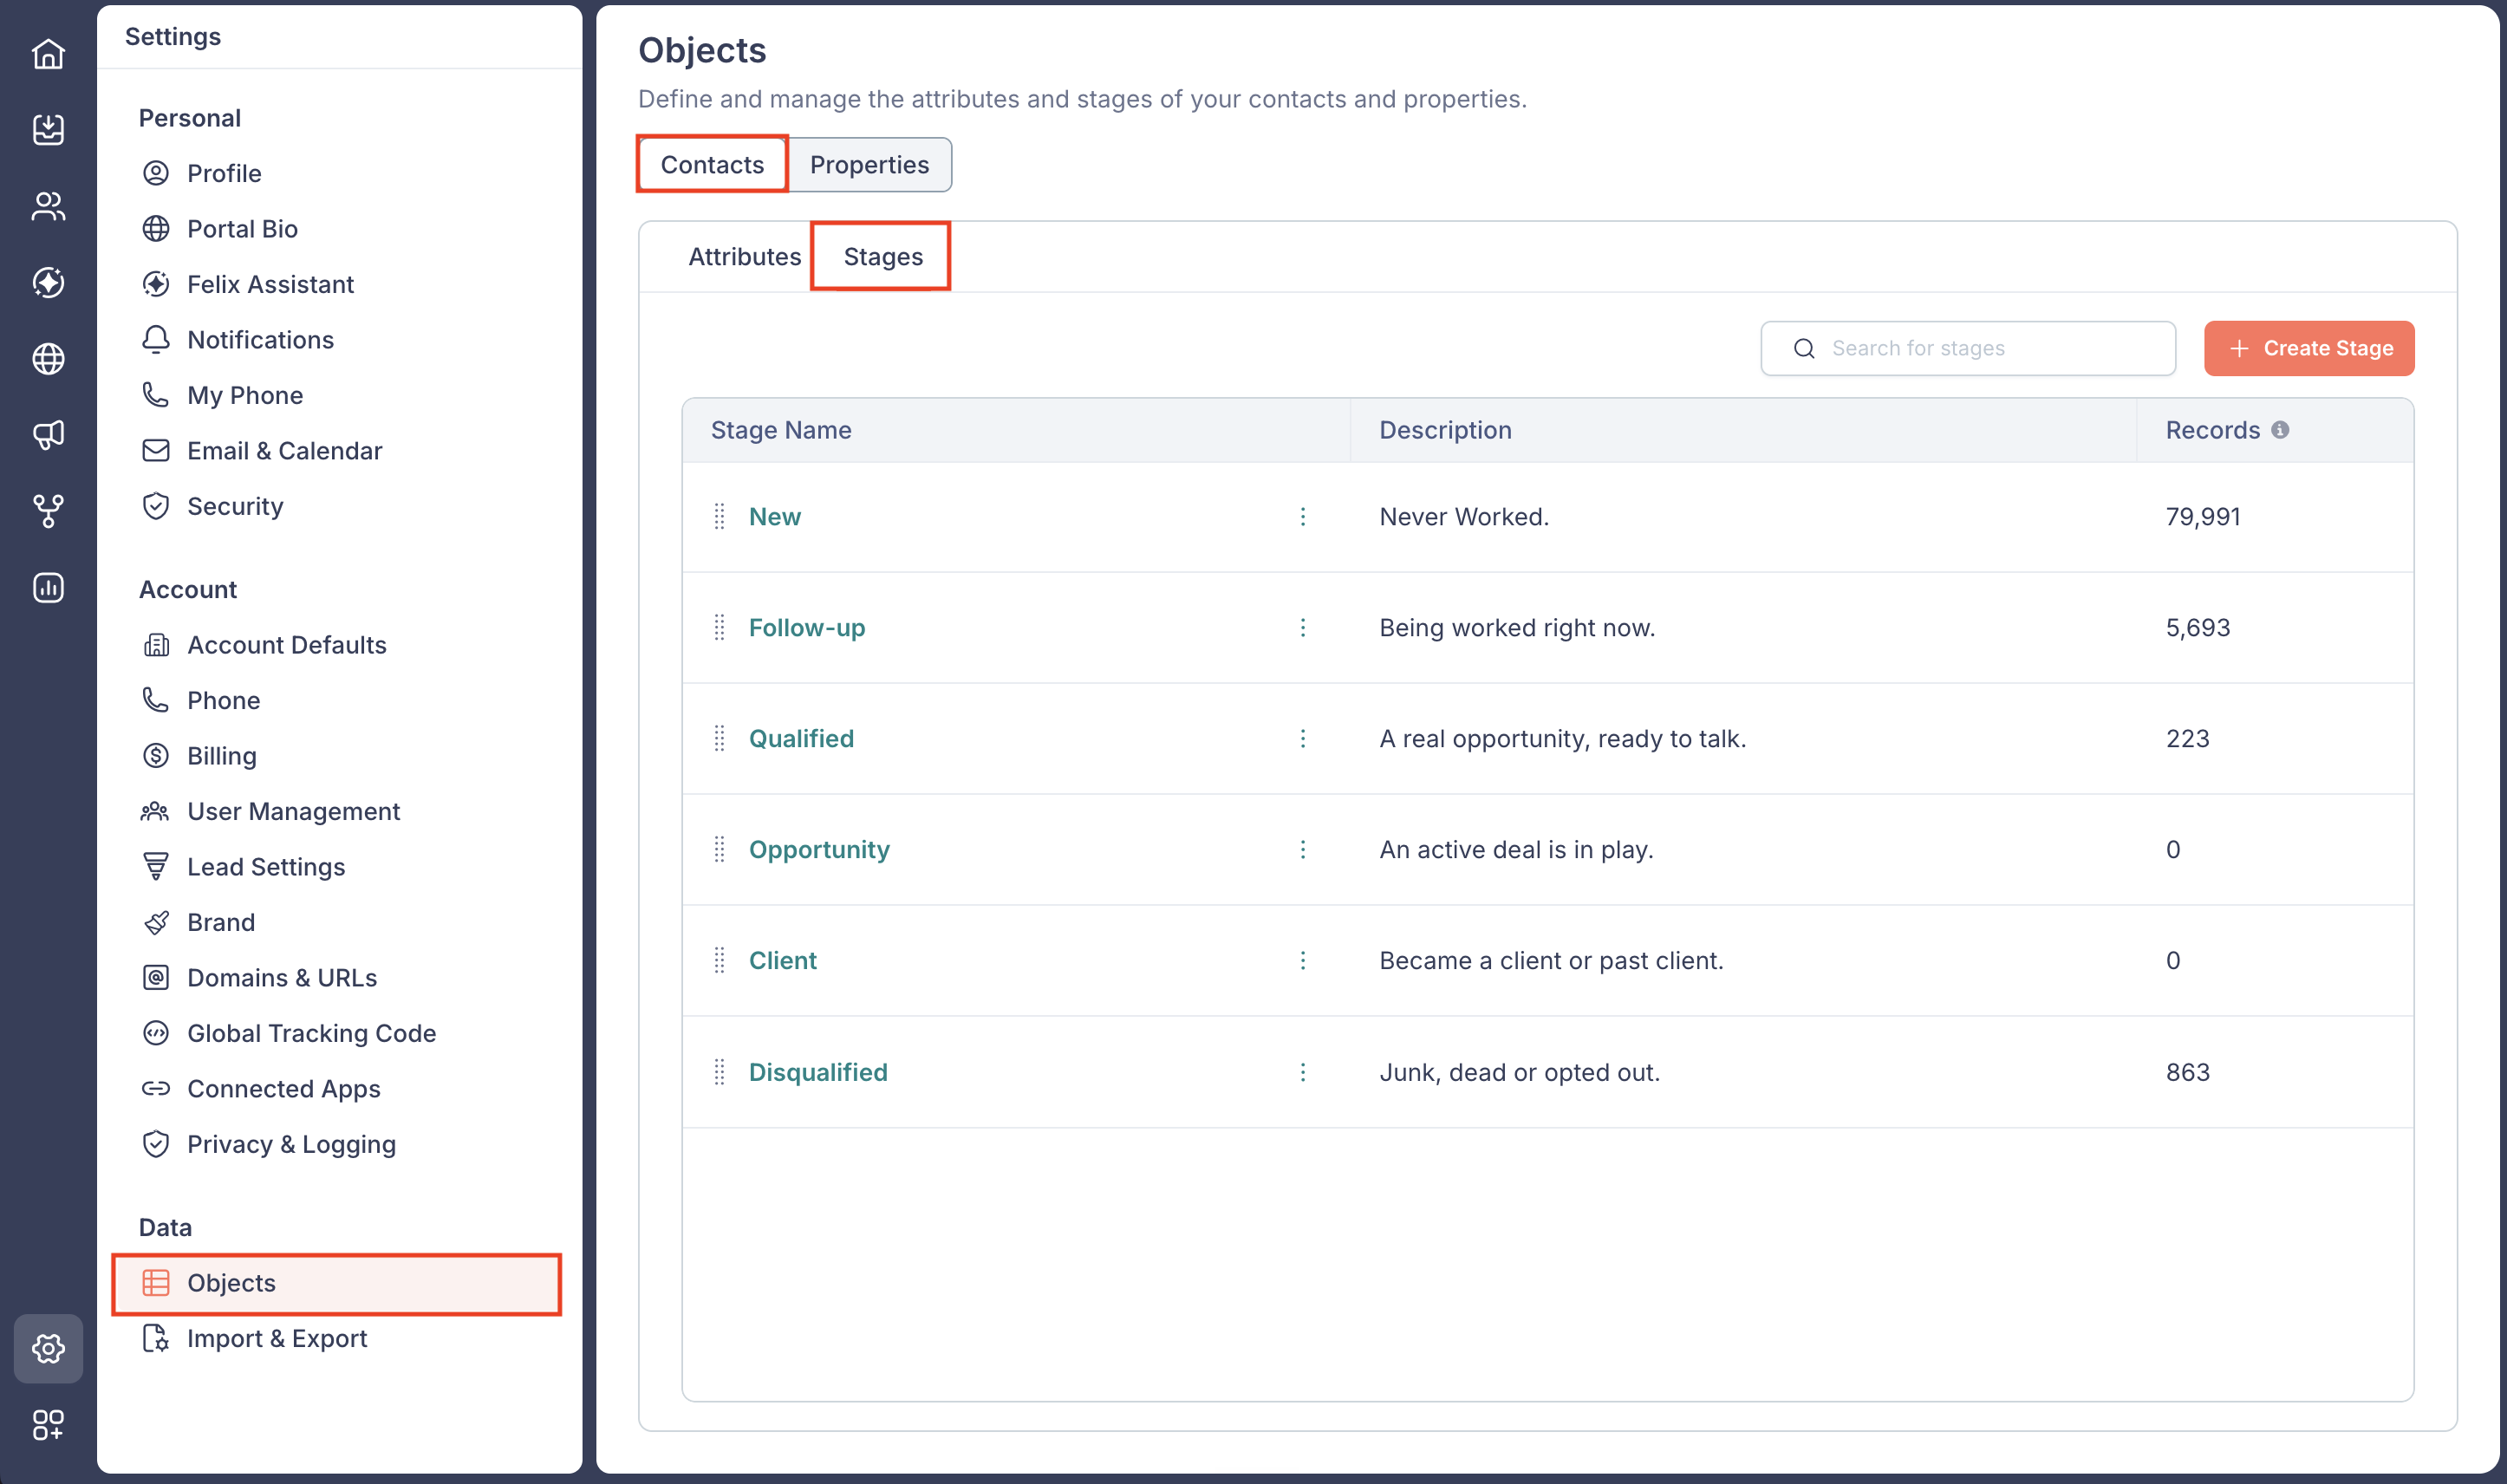
Each stage is listed with its description and Records, the number of contacts currently in that stage.
Create a stage
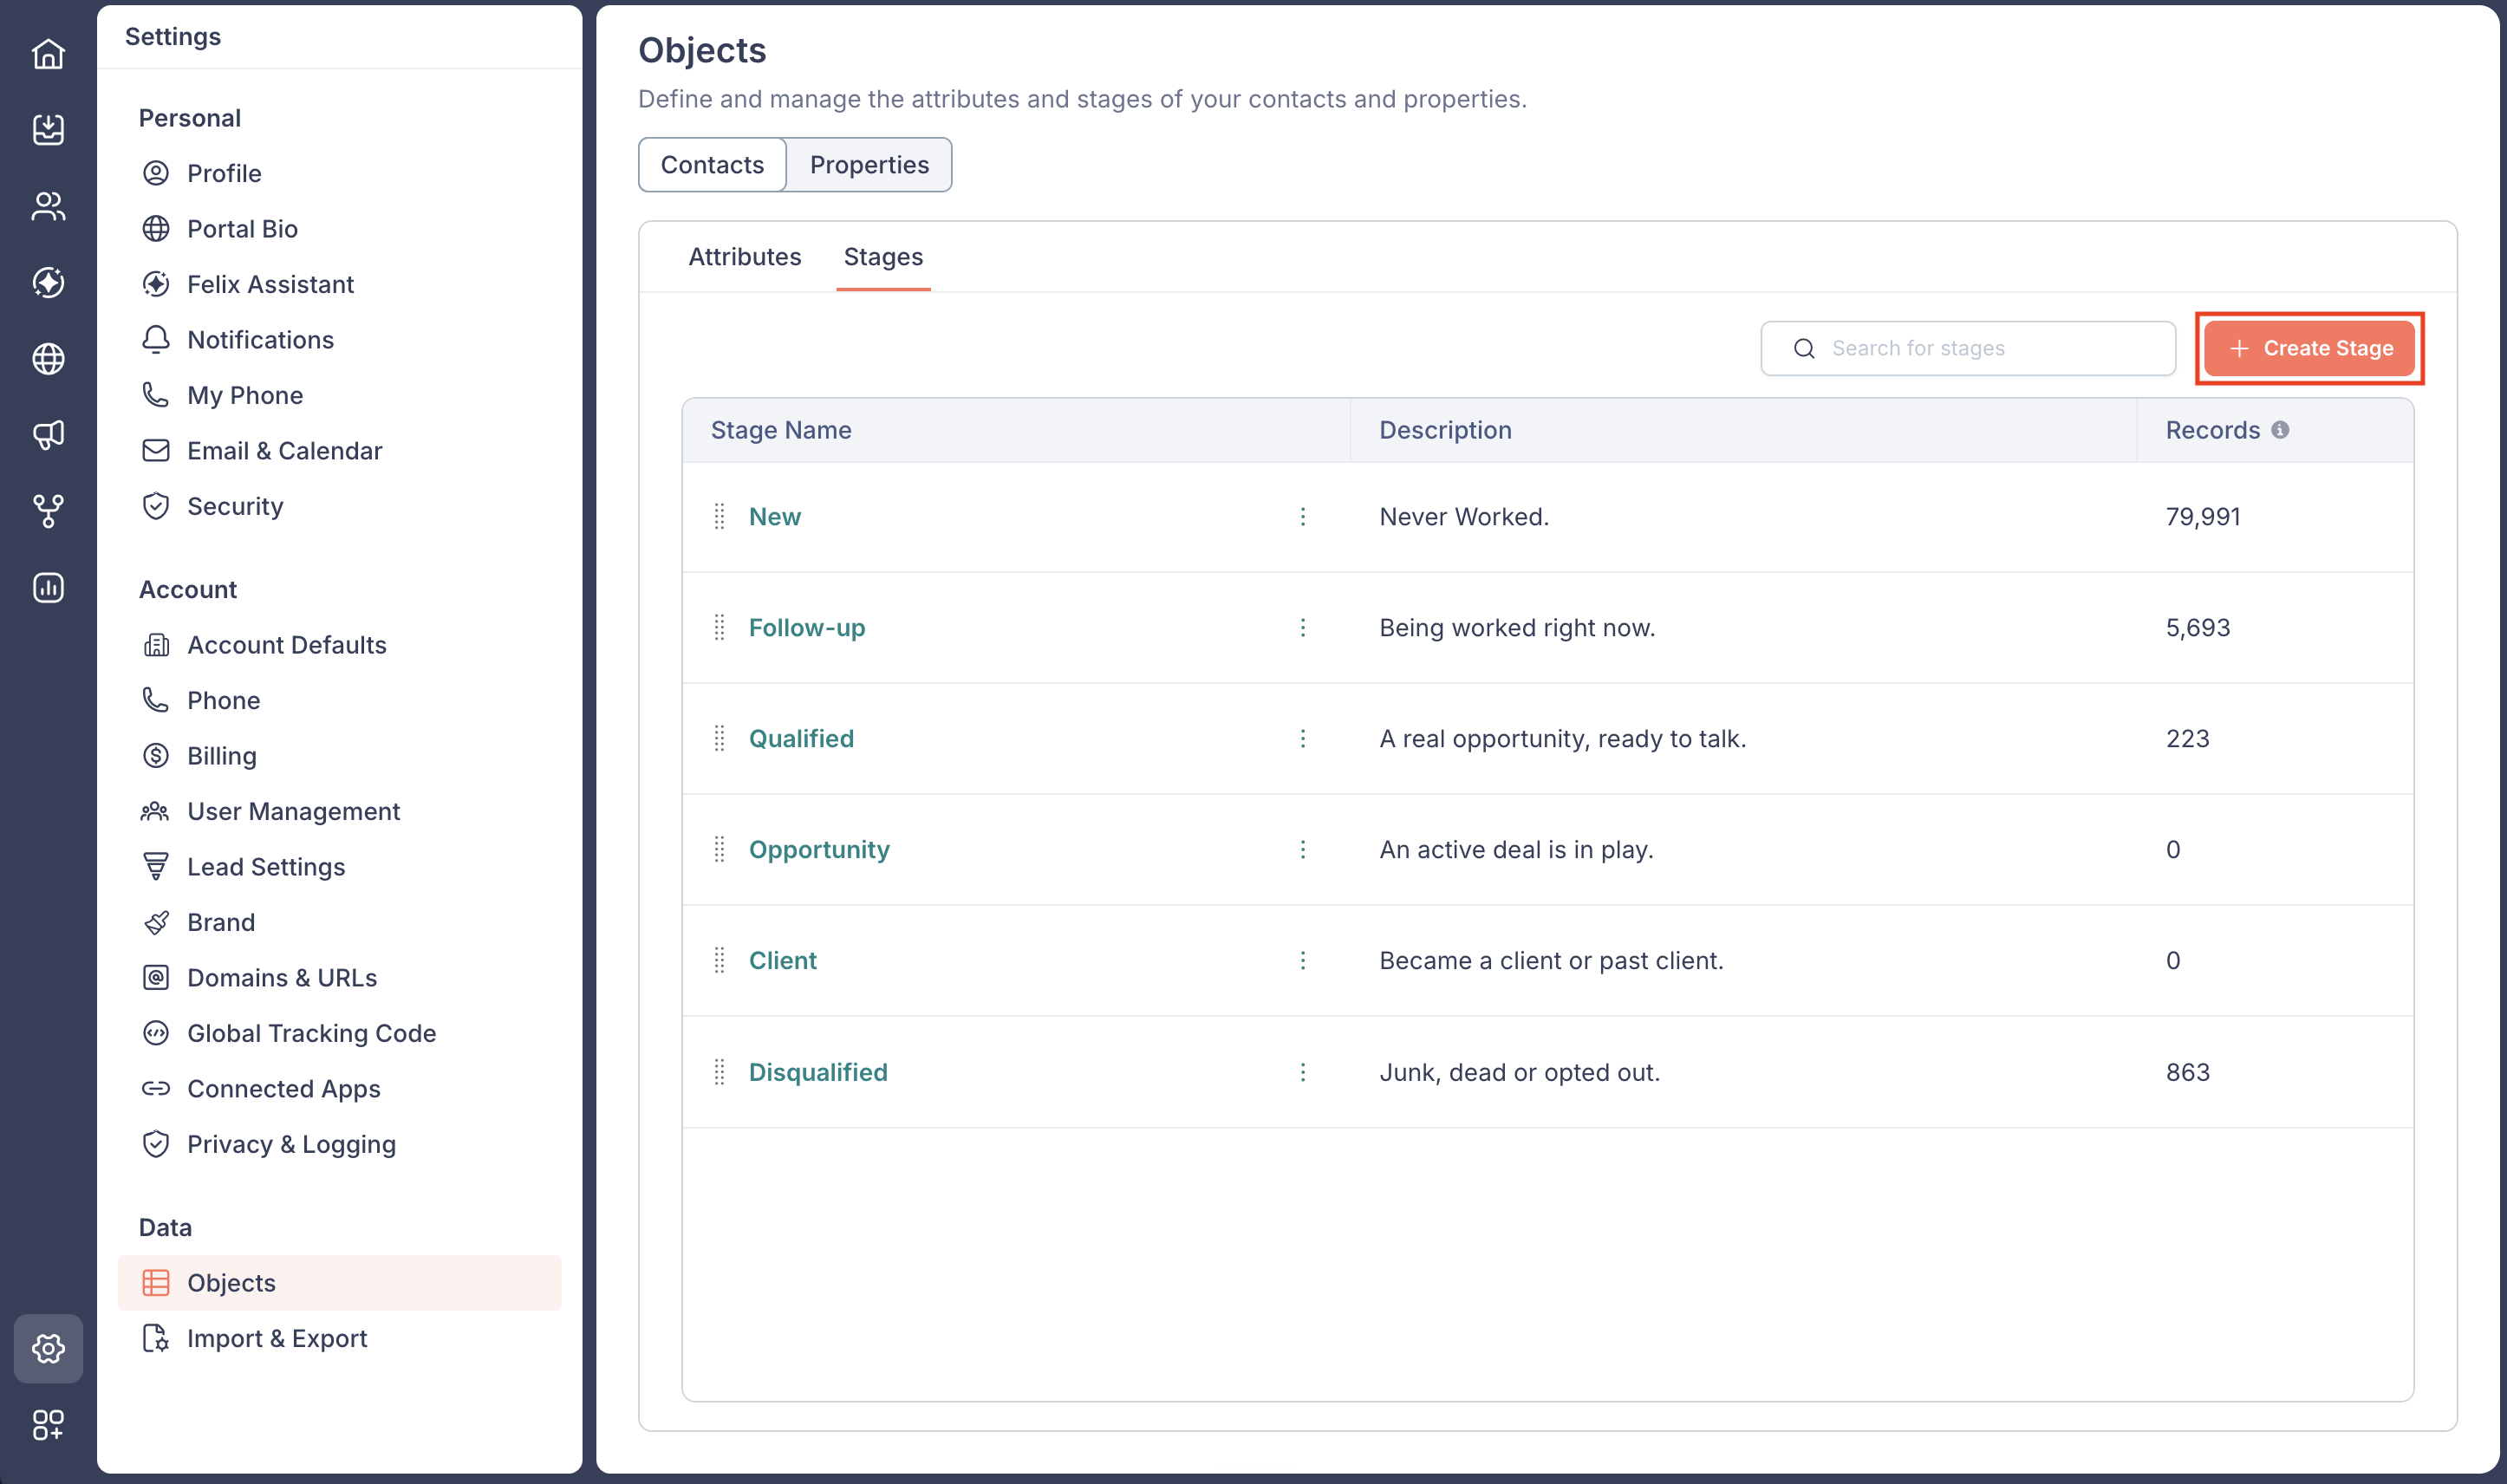
- Click + Create Stage in the top-right corner.
- Enter a Stage Name and Description. Both are required, and the description can be up to 240 characters.
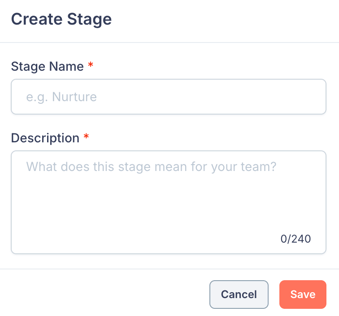
- Click Save.
Edit a stage
- Hover over a stage and click the Edit (pencil) icon next to its name.
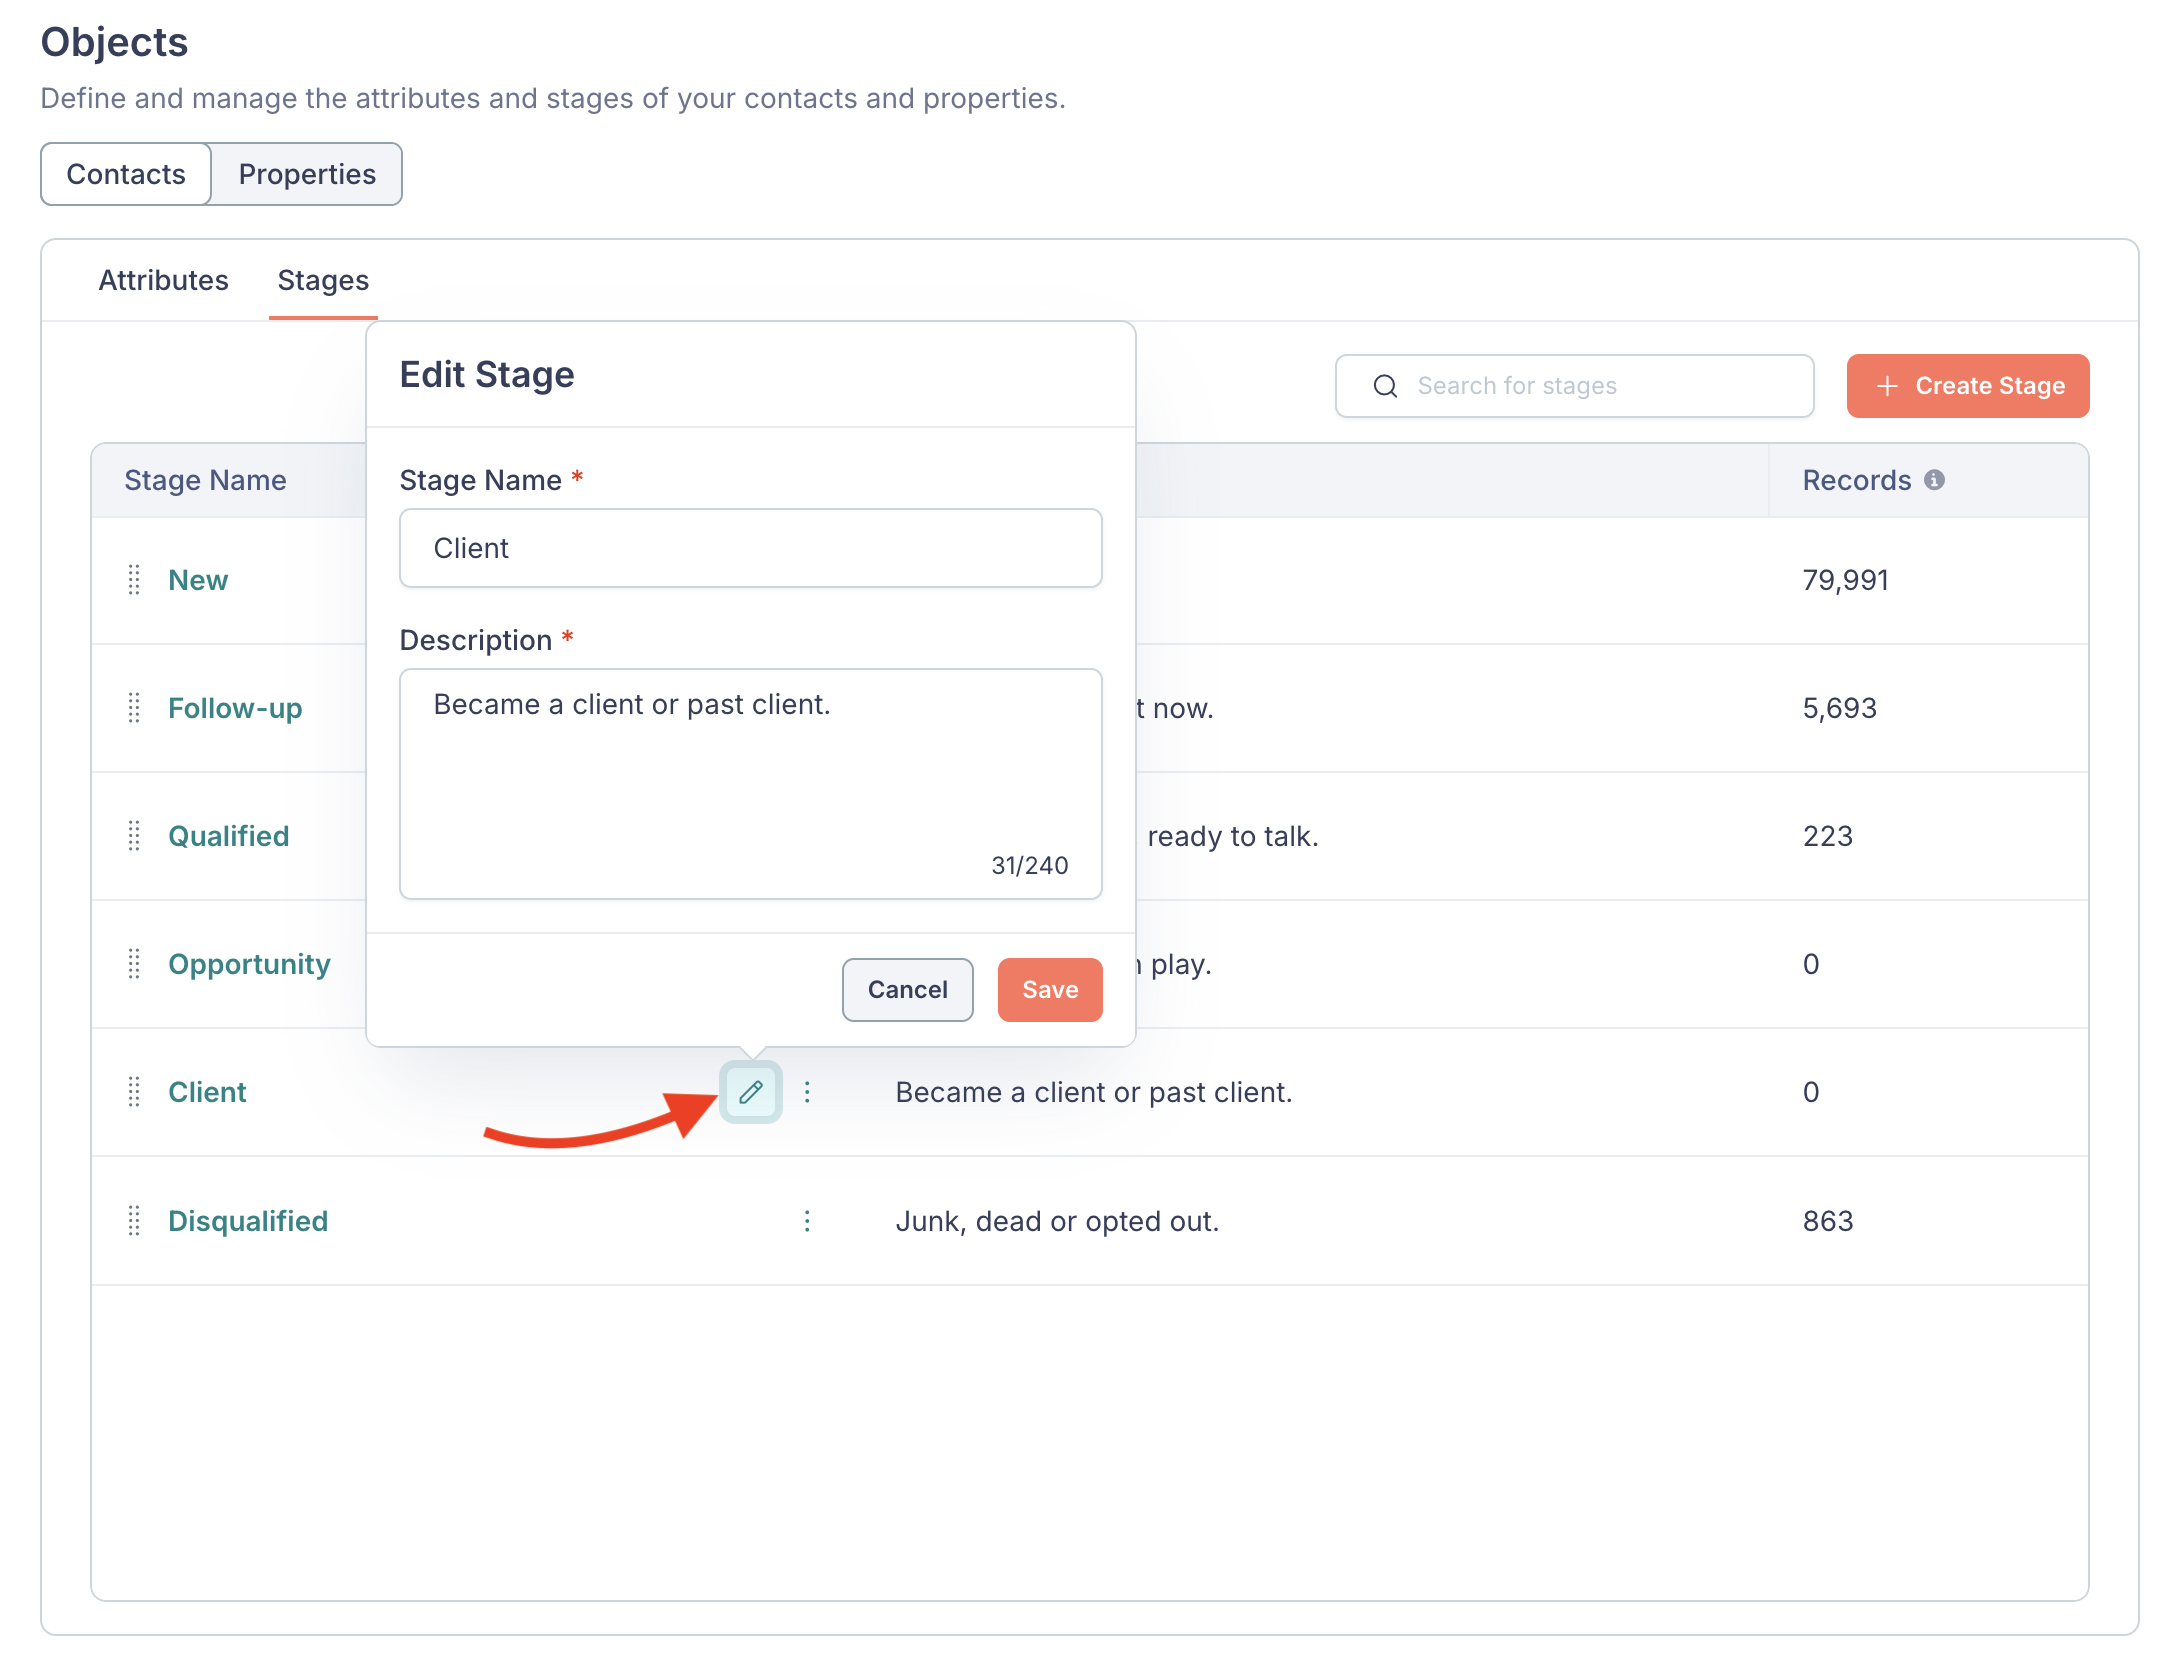
- Update the Stage Name or Description.
- Click Save.
You can edit both system and custom stages.
Reorder stages
Drag a stage by the handle to the left of its name to move it.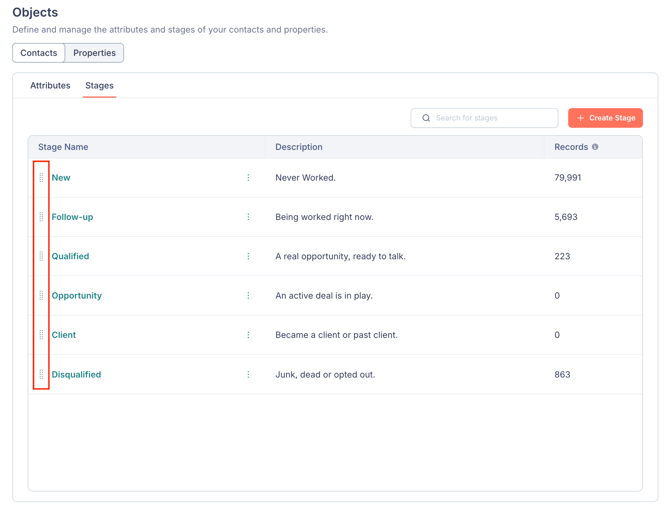
The order on this tab is the order stages appear in stage dropdowns across Fello.
Delete a stage
- Click the 3-dot icon next to a custom stage and select Delete.
- If the stage is used in any segments or workflows, they're listed under Assets preventing deletion. Remove the stage from those assets before continuing.
- Click Delete to confirm.
🗒️ Note: System stages (New, Follow-up, Qualified, and Disqualified) can't be deleted.