Fello's image library is a shared asset manager where all your images are stored in one place. Whether you upload images from your device or generate them with AI, they are saved to your library and can be reused across different areas of Fello – including emails, landing pages, and more.
In this guide:
- Accessing the Image Library
- Browsing and Using Images
- Uploading Images
- Creating Images with AI
- Viewing Image Details
- Managing Images
Accessing the Image Library
The image library is available wherever Fello allows you to add an image. You can access it from the following places:
- Email Builder - When adding or editing an Image block, Video thumbnail, or Section background image.
- Landing Pages - (Coming Soon)
In each of these areas, you'll see three options for adding an image:
- Create — Generate a new image using AI.
- Browse — Open the image library to select an existing image.
- An upload icon — Upload an image directly from your device.
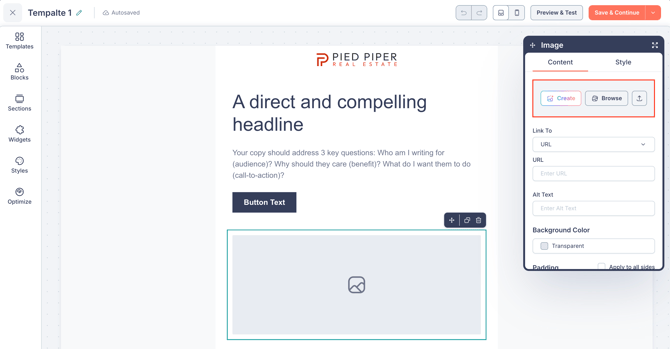
Clicking Browse (or Create) opens the Select Image modal, which is the main interface for the image library.
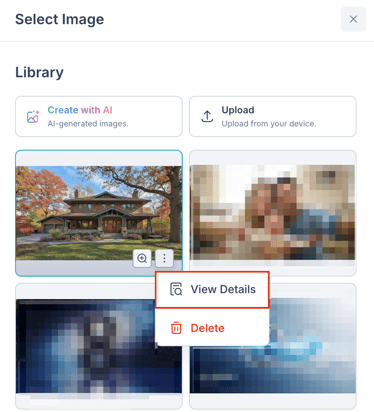
Browsing and Using Images
To browse your saved images:
- Click Browse from any image selection area.
- The Select Image modal opens, showing the Library tab with a grid of all your uploaded and AI-generated images.
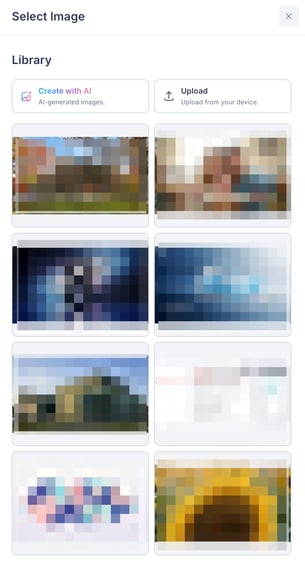
From here, you can:
- Scroll through your images to find the one you want.
- Hover over an image to reveal a Zoom icon (to preview it at full size) and a 3-dot menu icon.
- Click on an image to select it and add it to your content.
To use an image:
- Click on the image you want to use, or open View Details and click Use Image.
Uploading Images
To upload an image from your device:
- Click the Upload icon next to the Create and Browse buttons in any image selection area.
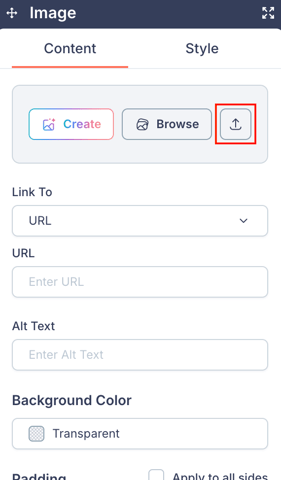
- Select an image file from your device.
Uploaded images are automatically saved to your image library and can be reused anywhere across Fello.
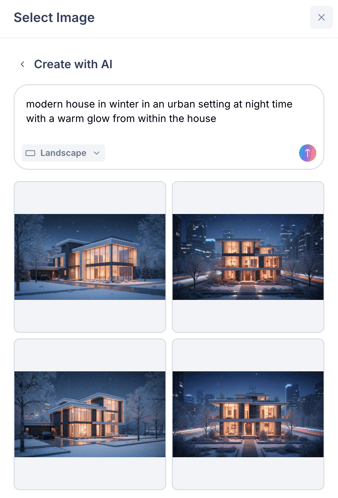
Creating Images with AI
Fello's AI image generation lets you create original images by describing what you need. Generated images are saved to your library for reuse.
To create an image with AI:
- Click Create from any image selection area, or click the Create with AI button inside the image library.
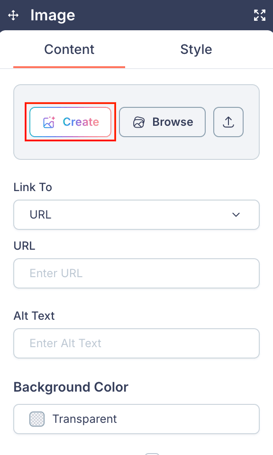
- Enter a description of the image you want in the text prompt field (e.g., "Image of a house" or "Modern kitchen with natural light").

- Select an Orientation for the image:
- Landscape — Wider than it is tall.
- Portrait — Taller than it is wide.
- Square — Equal width and height.
- Click Create.
💡 Tip: Click Try Sample Prompt to see example prompts and get an idea of how to describe images effectively.
Fello generates four image variations based on your prompt.
- Hover over any image to reveal a Zoom icon (to preview it full-screen) and a 3-dot menu.
- Click the 3-dot menu and select Add to Library to save the image for future use.
- Click on an image to select it and add it to your content.
🗒️ Note: You can generate new variations by updating your prompt and clicking Create again. Each generation produces four new images.
Viewing Image Details
To view the full details of any image in your library:
- Hover over an image in the library grid.
- Click the 3-dot menu icon and select View Details.
The View Details screen shows:
- A full preview of the image.
- Name — The image file name. Click the pencil icon to rename it.
- Uploaded Date — When the image was added to the library.
- Format — The image file format (e.g., PNG, JPG).
- Dimensions — The image width and height in pixels (e.g., 1344 x 768).
- File Size — The size of the image file (e.g., 1.45 MB).
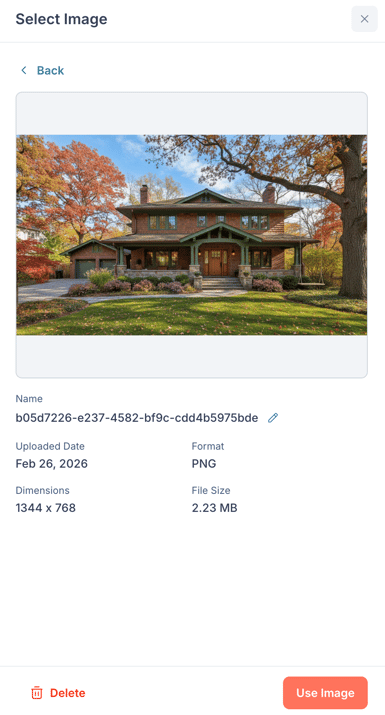
From this screen, you can click Use Image to add the image to your content, or click Delete to remove it from the library.
Managing Images
You can manage images directly from the library grid or from the View Details screen.
To rename an image:
- Open the image's View Details screen.
- Click the Edit (pencil) icon next to the image name.
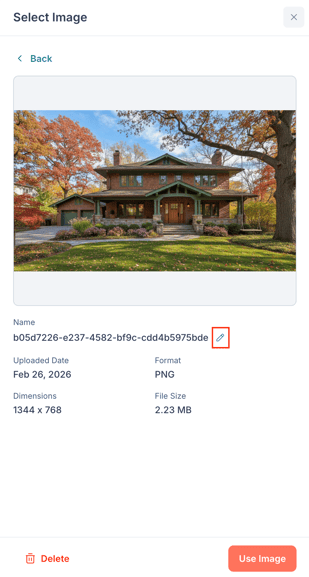
- Enter a new name and save.
To delete an image:
- Hover over the image in the library grid, click the 3-dot menu, and select Delete.
- Or, open the image's View Details screen and click Delete at the bottom.
🗒️ Note: Deleting an image removes it from your library, but it will still appear in any emails, landing pages, or other marketing assets where it is currently being used. A confirmation prompt will explain this before the deletion is processed.
If you require further assistance, please don't hesitate to contact Fello support (support@fello.ai).