How to set up your branding in Fello (Complete Guide)
Learn how to update your branding for marketing assets in Fello.
Displaying your own branding on marketing assets like emails and landing pages is crucial for people to not only identify your brand easily, but to also build brand awareness and trust over time.
Fello makes it easy to build a brand kit that looks great and effectively reflects your brand’s design language.
Set Up Branding With AI
If you’re setting up branding for the first time, you will have the opportunity to use Fello’s AI-powered branding tool which automatically analyzes your website and extracts key branding elements such as your logo, brand colors, and policy links. All you need is your website’s URL!
Here’s how to get started:
- Go to Marketing > Branding from the left sidebar.
- Enter your website’s URL. (This could be your business’s main website.)

🗒️ Note: You can choose to create your brand manually at this point, but it’s worth noting that you can edit and review your branding manually later even if you do choose to use the AI tool, as it is primarily meant to help you set up your branding essentials faster.
- Click Import Brand.
- Wait for a moment while your website is being analyzed. You will soon see the branding details that were fetched from your website.

🗒️ Note: There may be times where some or none of these details could be fetched, in which case you can add the rest of your branding details manually later.
- You can choose which of these details you want to use in your brand kit:
- Brand Logo: Select if you want to use the fetched logo. Make sure to preview it on different backgrounds to check if all parts of the logo are clearly visible.
- Brand Colors: You can select up to four brand colors that can be included in your kit. Later, you can use these colors to set primary and secondary colors for your brand.
- URLs: These are policy URLs that were found on your website, they will be used in your public facing marketing assets.
- Click Continue, after which you can review and update the rest of your branding manually.
Set Up Branding Manually
You can review and update your branding at any time. To do this:
- Go to Marketing > Branding.
- Click Edit Brand.
Here, you will find the following sections:
Brand Style
This section lets you update the following:
Brand Logo
00:02: Fellow fellow.
00:05: In this video, you will learn how to add your brand logo and colors navigate to the marketing tab. On the left hand side marked with a megaphone icon
00:16: Click on branding.
00:19: Enter your company website, link to automatically import your brand logo and colors. You also have the option of manually, entering your logo and colors in the create manually section.
00:32: On The Branding page, click on edit brand.
00:37: Click on the added logo option.
00:42: Select your brand logo from your computer, in short, a crop the image. So there are no blank spaces.
00:49: Click on submit to save.
00:53: If you would like your logo to be both your default digital logo and your print logo, you may toggle those options on or off here.
01:02: Click save to continue.
01:06: Now, click add color.
01:10: Find your brand Colors by dragging the selection tool, or by entering the hex code.
01:18: Select your preferred primary color.
01:21: Click save to complete the step.
01:27: Fellow fellow fellow.
You can configure your brand’s logo here.
To add a new new logo:
- Click Add Logo.

- Select a logo to upload from your device.
Note: The maximum file size for brand logos is 10 MB, and can be in PNG, JPG, or JPEG format. - Crop the logo if required, and click Submit.
- Select whether you want to use this as the default logo for digital (emails, landing pages, etc.) or print (postcards) marketing.

- Click Save.
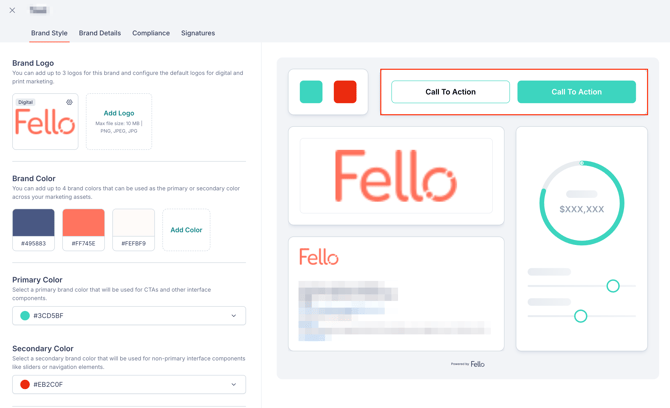
You can add up to 3 logos for your brand.
To configure whether a logo should be default for print or digital, or to remove a logo, click the gear icon next to a logo. 
Brand Color

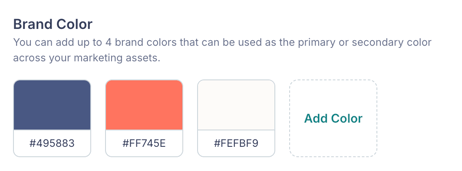
These are your brand colors, which can be used as your primary or secondary colors. Click Add Color to add a new color, or click the Bin icon over a color to remove it. You can add up to 4 brand colors.
Primary Color

Select a primary brand color that will be used for CTAs and other interface components.
Secondary Color

Select a secondary brand color that will be used for non-primary interface components like sliders or navigation elements.
Button Style

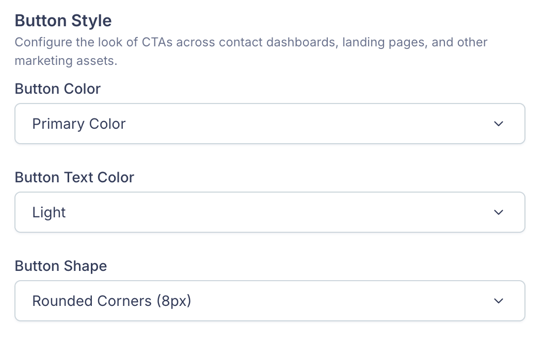
- Button Color: Choose whether you want your brand’s primary or secondary color to be used across CTAs across all your marketing material.
- Button Text Color: Choose whether you want Light or Dark button text color.
💡 Tip: Choose the button text color to contrast the button color – this ensures that text is clearly visible. For example, choose light text for darker button colors and dark text for lighter button colors.
- Button Shape: Select the shape of CTAs across your marketing. For example, if you’re embedding Fello’s widgets, you may want the CTAs in those widgets to match the other CTAs on your website.
You can preview how buttons will look on the right side.

Brand Details
00:02: Fellow fellow.
00:05: In this video, you will learn how to access and modify key brand information to keep your profile current and professional.
00:14: navigate to the marketing tab on the left hand side marked with a megaphone icon
00:20: Now that you're in the marketing tab, click branding to manage and edit your Brand's appearance and details.
00:28: Once The Branding page opens click edit brand to begin, modifying, your brand information.
00:35: Now, click on the brand details, tab to view, and update specific brand attributes.
00:42: Under brand details, enter or edit your brand name?
00:48: Now, enter the web address associated with your brand in the brand URL section.
00:55: now, enter your brokerage name,
00:59: Here, you'll enter your brand license number.
01:03: Enter your primary email address.
01:07: Enter the email address. You would like as your default reply, email.
01:13: Enter the name. You would like to display it in your signature.
01:18: In the custom signature field. You may add a tagline or phrase that you would like displayed in your signature.
01:26: Enter your phone number here.
01:29: If you have a second phone number, you may enter that here.
01:33: Click on ADD address to enter your address details.
01:38: And edit Address window will appear here. You may enter the address.
01:44: Once you've entered your address, you have the option to select this as a brand address or a return address or both a brand and return address.
01:56: Now, click save to finish.
02:00: That's it. You've completed adding your brand details. Now, review the details before, closing the window.
This section lets you add the following branding details, which will be used across your marketing as required to help people identify or reach out to you more easily. 
- Brand Name:The name of your brand.
- Brand URL: Your brand’s URL which will be used across marketing, and wherever required to redirect users.
- Signature Display Name: The name that will be used at the start of signatures to represent your brand. (This is typically your brand’s name, but you can use any other name too.)
- Custom Signature Field: You can use this field to include any other information along with your brand’s signature.
- Brokerage Name: The name of the brokerage that your brand is affiliated with.
- Brand License Number: Your brand’s registered real estate license number.
- Brand Email: Your brand’s email address, which can be displayed on marketing assets, and will also be used as the default reply email address for marketing emails to contacts who don’t have an assigned user.
- Default Reply Emails: You can add up to 2 additional email addresses that will be copied on replies to marketing emails, apart from the brand’s email address or a contact’s assigned user.
- Brand Mobile Phone: Your brand’s mobile phone number.
- Brand Office Phone: Your brand’s office, or landline phone number.
- Extension: If your brand’s phone number requires an extension to reach you, you can add it here.
- Address: You can add up to 2 addresses for your brand.
Click + Add Address to add a new address, or click the Edit (pencil) icon to modify an existing one. Now, you can update the required details such as the Name of the address, Street Address, City, State, ZIP Code, and Country.
Select the type of address:
-
- Brand Address: Your brand’s address, which will be displayed on marketing asserts.
-
- Return Address: Your brand’s return address, which will be displayed on print marketing like postcards. This can be used to return the marketing asset back to you, in case it is undeliverable. You can use any address where you’d like to receive these, such as a P.O box.
- Return Address: Your brand’s return address, which will be displayed on print marketing like postcards. This can be used to return the marketing asset back to you, in case it is undeliverable. You can use any address where you’d like to receive these, such as a P.O box.
You can also leave both options unselected, but your brand must have at least one default brand and return address.
To delete an address, click the Bin icon over it. 
Compliance
00:02: Fellow fellow.
00:05: In this video, you will learn how to configure privacy policies, terms of service consent, language and compliance logos to ensure your marketing material meet legal requirements.
00:18: navigate to the marketing tab on the left hand side marked with a megaphone icon
00:24: Now, click on branding.
00:28: Once The Branding page is opened, click on edit brand.
00:33: Here, click on the compliance tab.
00:37: In the privacy policy, URL click on the edit pencil to configure your privacy policy link.
00:45: here, you can select fellows default privacy policy or you may add your own
00:52: if you have your own privacy policy, add the URL here,
00:58: Now, click save to continue.
01:02: Now, let's add the terms of service by clicking on the edit pencil.
01:08: you may select fellows, default terms of service or you may add your own
01:14: If you would like to add your own terms of service, you may add that in the custom terms of service field.
01:22: Click save to complete this step.
01:26: Now, click on the consent to communicate, edit pencil.
01:31: Here you can select fellows. Default consent to communicate or you may add your own
01:39: If you would like to add your own consent to communicate, you may add that in the custom field.
01:46: Click save to complete this step.
01:50: Now, click the edit pencil for the digital disclaimer terms.
01:55: You may add or edit your disclaimer in the messaging box.
02:01: Toggle, the legal links on or off based on which you would like to display.
02:07: toggle on or off the compliance logos, you would like to display
02:13: You're allowed to select up to two compliance logos.
02:18: You can reset your compliance details by clicking reset to default.
02:24: Click save to complete this step.
02:28: If you have an email disclaimer or a print disclaimer, you may add those here by clicking on the edit pencils.
02:37: And that's it. You've added your compliance details. You may now review before closing out the window,
02:46: Fellow fellow fellow.
In this section you can manage disclaimers and legal text that will be displayed across your marketing. Click the Edit (pencil) icon near any of these fields to edit them. 
-
Privacy Policy URL: Add a link to your business’s privacy policy. If this field is left empty, a default privacy policy that’s provided by Fello will be used.
-
Terms of Service URL: Add a link to your business’s Terms of Service document. If this field is left empty, a default Terms of Service that’s provided by Fello will be used.
-
Consent to Communicate: The consent language that will be shown to your contacts or prospects before they submit a form. This will also be recorded on the Proof of Consent certificate. Fello’s default consent language will be used if this field is left empty.
-
Digital Disclaimer: Add a disclaimer to be shown on digital marketing assets, such as forms and landing pages (emails have their own disclaimer). You can choose to show or hide compliance logos like Equal Housing Opportunity, Realtor, and Equal Housing Lender.
-
Email Disclaimer: Add a disclaimer to be shown on all marketing emails. You can choose to show or hide compliance logos like Equal Housing Opportunity, Realtor, and Equal Housing Lender.
-
Print Disclaimer: Add a disclaimer to be shown on all print marketing such as postcards. You can choose to show or hide compliance logos like Equal Housing Opportunity, Realtor, and Equal Housing Lender.
Signatures
This section allows you to configure the default signatures for print and digital marketing. 
You can click + Add Signature to create a new one, or click the Edit (pencil) icon to modify an existing one. 
- Signature Name: Enter a name to identify this signature in Fello. It will not be used in the signature itself.
- Choose Template: Choose Brand Signature Style, if you want to use your brand’s signature on all marketing assets, or choose User Signature Style if you want to display the signature or contact card of a contact’s assigned user on marketing assets. Learn More
- Display Image: The image that will be displayed along with your signature. You can choose between your brand’s logo or a custom image for Brand Signature Style. If you’ve chosen User Signature Style, then you can choose between the assigned user’s avatar (profile photo), or a custom image.
- Signature Fields: Customize the signature fields that you want to display. Click + Add Field to add more signature fields, or click the Trash icon to remove a field. You can also rearrange the order in which these fields are displayed by dragging and dropping them.
Select “Set as primary digital signature” or “Set as primary print signature” to use it as the default signature for that medium.