You can choose between Smart Content and Customizable Content for automations in Fello.
Customizable Content allows you to customize every part of an email like the subject and body with your own content, however this content does not refresh automatically like Smart Content.
In this article:
Configure Your Own Emails
To get started:
- Go to Marketing > Emails.
- Click + Create Email to create a new email, or click the Edit (pencil) icon next to an existing custom email.

- Click Select Customizable Content. (Ignore this step and the next one if you're editing an existing custom email.)

- Select a template and use it to create a new email.
- Select a part of the email that you want to customize.

- Type in your email content as required.
💡Tips for great email content:
- Ensure your subject and header are short and concise. Try and make them connect with each other, without sounding repetitive.
- Add personalizations to your content, especially the email's subject. Contacts are more likely to click on your email if they can relate to personalized information in the subject.
- In general, your subject should be fewer than 9 words, and contain minimal punctuation and emojis.

🗒️ Note: If you want to add line breaks for a paragraph, you can do so by adding <br> before a new line, as shown below:
You can also add two of these in succession to start a new paragraph:
- Click Personalize to add dynamic information that will be filled in automatically when the email is sent to your contacts. The following personalizations are available:
- First Name: The email recipient's first name in Fello.
- Street Address: The email recipient's address in Fello.
- Month Year: The current month and year, at the time the email is sent.

- Click the Gear Icon on the left to customize the following:

- Preview Text: This will be used as the preview text that displays in some email clients.
- Lead Type: When contacts engage with this email, their lead type in Fello will be categorized based on your selection here.
- View As: Select the brand that you'd like to preview this email as.
- Click Publish to save your changes.
Now this email can be used in automations, and will be updated in any automations that it’s already used in.
Preview & Test Emails
You can preview what an email will look like for a particular contact. To do this:
- Click the 3-dot icon in the top-right corner and select Preview & Test.

- Enter the email address to which you want to send the test email.
- Select the contact for whom you want to test this email.
- Click Send Test Email.
Check the email inbox to which you sent this email to preview it.
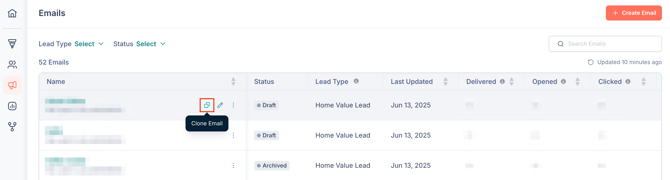
Clone Emails
If you want to create similar emails with only a few changes between them, you can clone an existing email and then customize it. To do this:
- Click Clone Email next to the email that you want to clone.
- Enter a name for the new email.
Make changes as required and click Publish.